


Photographing the Moon:
Getting a Sharp, Detailed Result
Photographing the Moon looks like it should be easy. It’s bright, it’s obvious, and it’s highly predictable. But most first attempts fail for the opposite reason to star photography: overexposure and lack of detail. Don’t worry, it gets a lot easier once you realise that you’re actually photographing something in daylight, even when it’s night time where you are!
I’ll explain below.
The objective here is simple: produce a sharp image of the Moon where surface detail (craters, shadows, texture) is clearly visible. Not a glowing white blob, or a little white dot.
This guide focuses only on the decisions that materially affect that outcome.
What You’re Trying to Capture
You are not photographing “the night sky” here. You are photographing a sunlit object in space. Yes, the Moon you observe in the sky at any time, is showing how it looks in the Lunar daytime. Apart from under very specific circumstances, the night-time part of the moon is generally not visible.
That distinction matters.
Realistic options:
- The Moon on its own (using telephoto)
- The Moon in a wider scene (landscape + Moon)
- Different phases (full, crescent, etc.)
Important: a full Moon is actually the least interesting visually. It has the least shadow detail, so getting interesting geographic detail is difficult.
Failure mode: treating the Moon like a dark subject and overexposing it. It’s easily visible areas are in daylight: Lunar daylight.
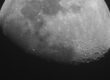
Waxing gibbous moon shot with 1200mm focal length, cropped.

Where and When to Shoot
Unlike stars, you do not need darkness. In fact, some of the best Moon images happen in twilight. I’ve taken a few of my best moon images in the last-quarter phase when the moon appears in a blue sky in the afternoons.
What matters:
- Clear sky
- Stable air (less atmospheric distortion)
- Moon phase and position
Lower on the horizon = more atmospheric distortion (and often a larger apparent size).
Higher in the sky = sharper, cleaner detail.
Failure mode: shooting low on the horizon expecting sharp results.
Minimum Gear That Actually Matters
The constraint here is focal length. You can shoot the moon at night hand-held, depending on your focal length. I shoot almost every moon shot hand held, even with extreme focal lengths like 1200mm, in which cases I use VR and brace myself close to the ground (sitting with elbows on knees) or against a solid object like a wall.
What matters:
- A camera with manual control. I shoot in M mode.
- A telephoto lens (ideally 300mm+, more if possible.)
- A stable tripod is recommended, but not mandatory.
What doesn’t materially matter:
- Ultra-fast aperture lenses
- Wide-angle lenses (unless you’re doing composition-based shots)
At 50mm, the Moon will be small. At 300mm+, it starts to become a subject. Be realistic: if you expect the moon to fill the frame, you’ll need the kind of focal length with a price-tag that could make your eyes water. Don’t stress that. Use the longest lens you have.
Failure mode: expecting detail from insufficient focal length.
Lunar eclipse composite image, approx 45min past totality, 2026

A Practical Exposure Baseline
The Moon is bright. Daylight. Treat it accordingly.
Use this as a baseline:
- Aperture: f/8 (or thereabouts for sharpness)
- Shutter: 1/125 to 1/250
- ISO: 100–200
This is often referred to as a variation of the “Looney f/11” rule. The details don’t matter. What matters is understanding that the lit part of the moon is almost always the exact same exposure.
From there, adjust based on your histogram and visual result, but also take a note of what works for you for next time.
Failure modes:
- Blown highlights: shutter too slow or ISO too high
- Soft image: shutter too slow (motion or atmospheric blur)
Sharpness and Stability
At longer focal lengths, small movements are magnified.
You have three options:
- Use a tripod and a timer/remote
- Use a fast enough shutter speed handheld
- Use VR if your setup supports it.
Even on a tripod:
- Use a timer or remote trigger
- Avoid touching the camera during exposure
Failure mode: micro-blur from vibration or shutter shock.
Getting Focus Right
Autofocus can work on the Moon, but don’t assume it’s perfect. It’s sometimes hard to get spot on when your field of view is mostly empty sky.
Best approach:
- Use autofocus to get close.
- Switch to manual or keep your finger free of the focus once you got a fix on it. I don’t use a shutter-button focus, so my shooting button is separate from my focus button.
- Use magnified live view on the edge of the Moon if necessary.
- Fine-tune until the edge is crisp.
Failure mode: slightly soft edges that only become obvious later.
Lunar alignment with Auckland Sky Tower, planned using PhotoPills app.

A Basic Shooting Workflow
Same principle as always: iterate and improve over time.
- Set your baseline exposure.
- Take a shot.
- Zoom in and inspect crater detail.
- Adjust shutter or ISO.
- Repeat.
Don’t trust the full image view. Always zoom in.
Failure mode: assuming sharpness without checking detail.
Simple Post-Processing
Your RAW file may look flatter than expected, but I have found with Z8 that my moons shots are near perfect straight out of the camera.
Basic adjustments:
- Reduce highlights (if needed).
- Increase contrast (if needed).
- Add clarity/texture carefully.
- I also run denoise, even if the ISO was only 200 or 400.
- Apply some sharpening (if needed). Careful not to over-sharpen.
- Also check for Chromatic Aberration around the edges between light and dark.
The Moon tolerates sharpening well, but there is definitely a limit.
Failure mode: over-sharpening creating halos or artificial edges. Moon images with sharpening artefacts through the image don’t look great.
What “Good” Looks Like
A successful result is:
- Clear crater and surface detail.
- No blown highlights.
- Crisp edge definition.
- Minimal if any motion blur.
- Natural contrast.
If it still looks like a glowing disc, exposure is wrong.
Waxing cresent “smiley” moon, shot in a sunny afternoon blue sky

Lunar phases
The next thing to experiment with in Lunar photography is shooting at different phases:
- Full moon: Not that interesting on its own in my opinion.
- Waning gibbous moon (“fat” but not quite round): usually shot late at night, 2~7 days after full moon.
- Waning half-moon: shot 7~8 days after full moon, late at night or in the morning hours.
- Waning crescent moon: shot in the morning hours, 8~13 days after full moon.
- New moon minus 1 day: a sliver of moon shot at dawn
- New moon plus 1 day: a sliver of moon shot at dusk.
- Waxing crescent (new moon +2~3 days): Sometimes you can photograph the dark side of the moon at this time, because the light bouncing off the Earth slightly lights up the dark side and this can become visible.
- Waxing half-moon: visible during the daytime, about 21~22 days after full moon, or about 7 days before the next full moon. Good time for blue-sky images of the moon, especially late in the afternoon when this moon is highest in the sky.
- Waxing gibbous moon: rises in the afternoon in the week before full moon. Best shot any time from afternoon to after dark.
- Back to Full moon. I use PhotoPills to help me plan where I should be to photograph the moonrise of the full moon behind a landmark like the Auckland Sky Tower. The full moon rises just after sunset, when the sky is usually still a deep blue.
Final Note
Moon photography is less about complexity and more about restraint.
Most failures come from overexposure, poor focus, or insufficient focal length, not lack of advanced gear.
Once you can consistently produce sharp lunar detail, you’ve met the threshold.
What camera settings are best for photographing the moon?
The moon is bright, so lower ISO, faster shutter speeds, and mid-range apertures typically produce sharper results than high ISO night settings used for stars.
Why does the moon look overexposed in photos?
The moon is often overexposed because it’s treated like a night subject, when in reality it reflects strong sunlight and requires exposure similar to daylight conditions.
What focal length do you need to photograph the moon clearly?
Longer focal lengths provide more detail, but even moderate telephoto lenses can capture a defined moon image if exposure and focus are handled correctly.
Why does the moon look small in my photos?
The moon appears small because it occupies a very small portion of the sky, and wide or standard focal lengths do not magnify it enough to fill the frame.
Do you need specialist equipment to photograph the moon?
No. While longer lenses improve detail, basic camera gear can still capture a clear and recognisable moon image with correct technique.
What is a Blue Moon?
A Blue Moon is when the moon is full for the second time in the same month, which happens once in about 2-3 years, related to the expression “once in a blue moon” meaning: not very often, or even rarely. It doesn’t appear blue.