


Astrophotography for Beginners:
Getting a Usable First Result
Before I start, let’s be frank and say: I am not an atsro-photographer. I’m just a photographer. But I have occasionally taken Astro photos in the past and have been deep into the technical aspects of photography for over 40 years. This guide is just based on “what I did”, and to me, that’s as good a starting point as any, right? And you might appreciate it.
Astrophotography has a reputation for being technical, expensive, and inaccessible. It can be, but it doesn’t need to be. I took my very first Astro photo when I was about 12 years old, using an (even then) vintage Zeiss Ikon Nettar 6×6 film camera, and capturing my first satellite trail on that camera too!
Back then, seeing satellites was not especially common. Today, it’s probably one of the biggest issues with observing the night sky, aside from light pollution. So if you use my guide below and find you’ve got scratchy-looking lines in your final pics, it’s almost certainly a satellite (or several), and odds are high that it’s a Starlink one. They account for about 65% of all satellites as of time of writing.
No surprise: the name “Elon Musk” has become a cuss-word for dedicated Astro-photographers.
But back to the point of my article:
At entry level, the objective is simple: produce a sharp image of the night sky where stars are clearly defined, exposure is balanced, and the result resembles what you expected to capture. That’s the threshold. Everything else is progression.
This guide focuses only on the decisions that materially affect that outcome.
What You’re Trying to Capture
Not all astrophotography is the same, and your subject determines everything that follows.
For a first attempt, you are realistically choosing between:
- A wide scene with stars (with or without foreground)
- The Milky Way (if it’s visible at your location and time of year)
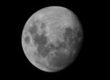
- The moon*
Avoid planets and deep-sky objects initially. They require longer focal length, tracking, and processing beyond beginner thresholds.
*Important: If you answered “the Moon”, in the options above, check out this other article instead. The rest of this article is about photographing the Stars.
Failure mode: choosing a subject that your gear or conditions cannot support. Stay realistic. If you’re not sure what realistic is, ask someone who’s done and probably failed at Astro-photography plenty of times before.
Where and When to Shoot
You need darkness. Not just “night”, but actual darkness!
Light pollution is the primary constraint. If you’re in a suburban or urban area, your ceiling is low regardless of technique, so it’s best to get out of town.
Minimum viable conditions:
- Clear sky (no high cloud)
- No moon, or the moon is below the horizon
- As far from city light as is practical
If you can see a dense spread of stars with your eyes, you’re in a workable location.
Failure mode: technically correct settings producing flat, washed-out images due to sky glow.
Minimum Gear That Actually Matters
You do not need specialised equipment to start.
What matters:
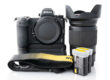
- A camera with manual control (any modern mirrorless or DSLR)
- A lens that can open to at least f/2.8 (wider is better)
- A stable tripod
What doesn’t materially matter at this stage:
- Brand
- Sensor size (within reason)
- High-end lenses
If the camera can hold a several-second exposure without movement, you’re operational.
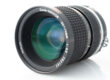
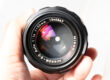
Personally, I might even choose to use a vintage lens (maybe the 20mm f/3.5, 35mm f/1.4, or even 50mm f/1.2) on my modern Nikon, because the fancy features of modern lenses isn’t needed at all for a great starting point, and manual lenses are actually less hassle. My alternative will be the Z 14-30mm, unfortunately that’s f/4 fully open and therefore the “slowest” option. The Z 24-70mm f/2.8 could be better.
Failure mode: instability. Any movement during exposure destroys sharpness. Use the self-timer on the tripod and plant your tripod on solid ground (not a wooden deck that you’re also standing on).
A Practical Exposure Baseline
You are balancing three variables: aperture, shutter speed, and ISO. The objective is not theoretical correctness, it’s a workable starting point.
Use this as a baseline:
- Aperture: as wide as possible (e.g. f/2.8)
- Shutter: 6-10 seconds on a wide angle lens
- ISO: 3200–6400
This will not be perfect, but it will produce a visible result. From there, adjust incrementally.
Failure modes:
- Too dark: increase ISO
- Too noisy: reduce ISO and compensate elsewhere
- Star trails: reduce shutter time
There are other combos of issues in the failure mode, but address them after mastering these basics first.
Avoiding Star Trails (unless you want them).
Stars appear to move. Your camera records that movement over time.
If your shutter is too long, stars stop looking like points and start looking like lines.
A common shortcut is the “500 rule” (500 divided by focal length) to determine a maximum exposure time, but treat it as a rough ceiling, not a guarantee. Modern sensors expose its limitations.
Practical approach:
- Start at ~15 seconds for a wide lens (e.g. 20–24mm full-frame equivalent)
- Zoom in on your image and check star shape.
- Shorten exposure if stars are elongating (are not “points” of light).
Failure mode: images look sharp on the rear screen but show motion blur when reviewed properly.
If you in fact want the star trails:
You’ll need to use shutter times in the minutes, or even hours. A 1-hour shutter time will result in the stars appearing to move in a 15 degree arc, but to avoid too much light pollution from ruining the image, you will need to be in a pitch dark spot, well away from any stray lights, ideally in a certified Dark Sky zone, e.g. Great Barrier Island, or Tekapo NZ.
Getting Focus Right
This is the highest failure rate in beginner astrophotography.
Autofocus will not work reliably in the dark. You must focus manually, so turn that AF off! This is a big reason why I prefer to use an old manual lens.
Reliable method:
- Set focus to manual
- Find the brightest star or (very) distant light source to focus on
- Use magnified live view
- Adjust focus until the point is as small and sharp as possible
Do not trust the infinity mark on your lens. It is often inaccurate, and lots of Auto-Focus lenses actually focus slightly beyond the infinity mark. If you’re using an older manual focus lens, your lens might have a “hard stop” at infinity. If that’s the case, you could use that hard stop point as your focus.
Failure mode: images look acceptable on the camera screen but are soft when viewed properly.
A Basic Shooting Workflow
Do not aim for a perfect shot immediately. Iterate.
Here’s a simple loop:
- Set your baseline exposure
- Take a shot
- Review critically (zoom in)
- Adjust one variable
- Repeat
This is not a one-shot process. Expect multiple attempts.
Failure mode: making large changes across multiple variables and losing control of the outcome.
Simple Post-Processing
Your RAW image will probably look flat. That’s expected.
At minimum, you will need to:
- Increase contrast
- Adjust exposure slightly
- Reduce noise (within limits). Sometimes stars look like noise and can be removed with excessive noise reduction. Likewise, noise can look like stars. You’ll need to experiment with balancing ISO with against the issues that noise create in this sort of picture.
- Apply moderate sharpening but avoid too much. It causes
The goal is to reveal what’s already there, not fabricate detail.
Failure mode: over-processing, crushed blacks, artificial colours, or aggressive noise reduction removing star detail.
What “Good” Looks Like
A successful beginner result is:
- Stars are points, not streaks (unless you were aiming for streaks)
- The image is in focus
- The sky is dark but not completely black
- There is visible structure (star density, Milky Way if applicable)
- Noise is present but controlled
That’s the benchmark. Not perfection.
Final Note
Most people fail their first attempt due to focus, movement, or unrealistic expectations, not generally from a lack of expensive gear.
If you can consistently produce sharp, well-exposed images with basic equipment, you’ve crossed the only threshold that matters at this stage.
Everything else you might have heard about: stacking, tracking, specialised gear, is an optimisation problem, not a prerequisite. You could check out my other article if you’re interested in pushing this further.
Want to shoot pictures of the Moon? Read this article.
What settings do you need for beginner astrophotography?
Beginner astrophotography typically uses a wide aperture, high ISO, and a shutter speed short enough to avoid star trails, balancing light capture with acceptable noise and sharpness.
Do you need expensive gear to photograph stars?
No. You can start with a basic camera, a reasonably fast lens, and a tripod, focusing more on technique and conditions than high-end equipment.
Why do stars look blurry or streaked in photos?
Stars appear blurry or streaked when shutter speeds are too long for the focal length being used, causing visible movement from Earth’s rotation.
Is astrophotography mainly about camera settings or conditions?
Conditions are critical. Dark skies, low light pollution, and clear atmospheric conditions often have more impact on results than small changes in camera settings.
What is the biggest mistake beginners make in astrophotography?
A common mistake is overestimating what can be captured in a single image, leading to unrealistic expectations around detail, brightness, and clarity without advanced techniques.